On making lactic acid bacteria juice (LAB)
Continuing my adventures with microbes, I have now made lactic acid bacteria juice (aka LAB aka curds and whey) which is an important part of Korean natural farming, according to the YouTube hole I fell down a while back. LAB is used as a foliar spray and also as a soil drench. (Apparently you can also use it in hair and skin care too!)
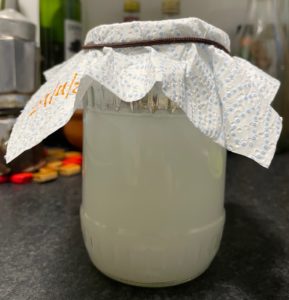
First stage: rice wash water to capture the lactobacillus.
I literally have no idea if this is a bunch of mental people on YouTube talking rubbish or if it is real, but I don’t care. Cultivating various microbes is genuinely the most enjoyable productive pastime (lest it enter into an unnatural competition with spa) that I have engaged in for a long time. Learning how to sew my own clothes was never this much fun, nor this easy and cheap.
Anyway, to make LAB, the first thing you do is get some cheap white rice and wash it in dechlorinated water. I dechlorinated my tap water by boiling it and then leaving it to sit uncovered for 24 hours to be on the safe side (I think boiling may have been enough). It’s important to get the chlorine out as that will inhibit the growth of the bacteria.
I used about 1 cup of rice and 1.5 cups of dechlorinated water, but that was too much and a waste of rice. Next time I will halve the amount. You pop the rice in the water and wash it until the liquid turns milky and then you strain out the rice. You can save the rice to eat, to make IMO (post coming soon), or put it in your food compost or bokashi bin.
Next you put the rice wash in a glass jar, cover it with a breathable lid (I used kitchen roll), and use a hair- or elastic band to seal it. Then you put the jar somewhere away from direct sunlight and let the rice wash ferment for a few days. As I do bokashi, I put mine down by my bokashi bins. I literally have no idea if the lactobacillus are on the rice already or if we are magically collecting them from the air, but in case of the latter, I figured it would be good to put the rice wash near the bokashi bran as that has lactobacillus in it.
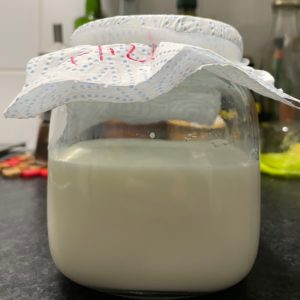
Day 1 of the milk inoculated with the fermented rice wash.
Most of the YouTube videos say that it takes between 2-3 days to ferment the rice wash, but mine took considerably longer. What you are supposed to see is a film on the top of the water, and the smell is supposed to change from a sourdough type smell to a sweet one. By day 5, mine still smelled of sourdough and there was only a very slight film. As I had already bought the milk and was worried it would go off, I decided not to wait any longer than that, but next time I will wait until I notice the sweet smell. Anyway, point is, if you are in a cold house/climate, be aware that this first step takes much longer than many people say.
Next I put 500ml of room temperature, organic whole milk into a new glass jar and added 50ml of the fermented rice wash. As you are not supposed to use the film on the top, I inserted a 5ml plastic syringe like this (as I already had one) into the rice wash to get at the stuff in the middle. I then put another kitchen roll cover on it and left it on the kitchen countertop.
After 2.5 days, I could see a little bit of fermentation happening but not much. Honestly, my flat is colder than a witch’s tit due to greedy bastard energy companies making gas central heating unaffordable for more than two hours a day, so I decided to help the microbes out and I moved the milk ferment into my front room and put a tea cosy on it.
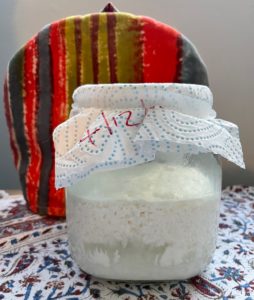
Day 3 of the inoculated milk – the magic is clearly happening!
Well, as you can see from this photo which is only about 15 hours after doing that, my microbes really benefited from being warmer. So top tip: if you live in a cold house, use a tea cosy to speed up the fermentation process. Your microbes will thank you. If I do this again before the warmer months, I will do that in the first stage too, I reckon.
What you want to see is a full separation of the curds (thick, spongey stuff on top) and whey (liquid stuff on the bottom), and it is the whey we are after in terms of the LAB, as that’s where our little happy chappies are mainly residing.
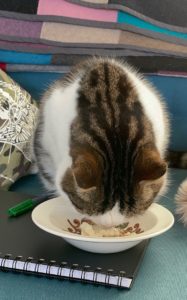
My cat eating curds on top of my writing notebook. Why self, why?
Once the curds and whey have fully separated, you then need to carefully remove the curds from the jar and strain the whey into another clean glass jar. I just reused avjar jars as they are the right size for my batch size, and I have loads because I am addicted to the stuff. I carefully removed the curds with a tablespoon and then strained the whey through a nutmilk bag and funnelled it into the new jar. Et voila!
To store it, I will just keep it in the fridge, again with a breathable, kitchen roll lid, and use it 1:1000 ratio as a foliar spray and soil drench. I did try eating some of the curds and I can hereby sincerely verify that they are rank. One of my cats did quite enjoy them though, however he eats twigs and plastic, so I’m not sure his opinion should be counted.
In sum, this was an easy, fun experiment that I will definitely be repeating when my garden is in full bloom. ?